|
|
Post by ARROW SLINGER on Jan 21, 2010 11:26:09 GMT -4
We are way overdue for another build!
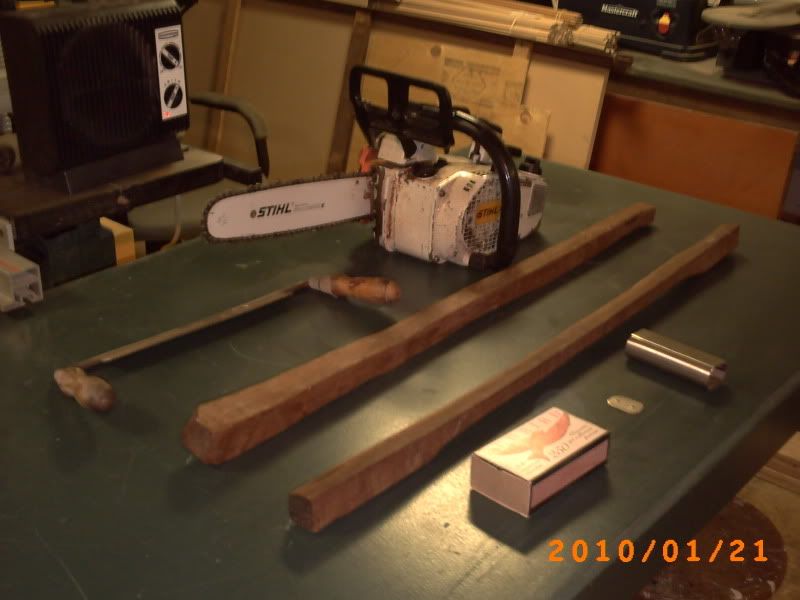
I am thinking takedown Osage! I have 2 billets I got from Peter (Bunny Hunnt) and a takedown kit I got from Clair (AM57)
I have never worked with osage before or something as complex as a takedown so feel free to put your 2 cents in.
And any input from Clair if he still visits here as to how his takedown kits work best!
I'll post some pics of what I have to work with and go from there!
|
|
|
|
Post by ARROW SLINGER on Jan 21, 2010 11:51:56 GMT -4
Here we go!  |
|
|
|
Post by huntwisely on Jan 22, 2010 6:51:27 GMT -4
Great Initiative, Rob !
Buil alongs are alway good as everyone of us does something a little different and life is about learning.
|
|
|
|
Post by archeryman57 on Jan 22, 2010 12:42:10 GMT -4
Sure, I still visit Rob. Sometimes I post too. Glad to help.
Start by Putting a center line on the backs of those billets. That way you can mark where to cut for the sleeve. Give the bow some backset while you mark the sides for the sleeve. After fitting the sleeve then you are ready to mark the layout of the back. Make it a bit wider to begin.
I will be away from the computer for a couple of days, but I will ckeck in by Monday.
Joe St Charles has a good tutorial on installing sleeves.
|
|
|
|
Post by huntwisely on Jan 23, 2010 8:29:43 GMT -4
I've been looking for that tutorial - I still have the two yew billets, center lines drawn, ready to fit the sleeve, and then recheck the center and draw the bow out.
|
|
|
|
Post by archeryman57 on Jan 24, 2010 2:03:31 GMT -4
OK, good lets go. Next step is removing wood that isn't needed and maybe adding some that we want. (The butt ends should fill the thickness of the hole in the sleeve. This can be accomplished by gluing a lam on to build up the thickness.) The billets can be cut at the butts as they will be in the sleeve.
At the end of one billet, mark a 45' line from front to the back and vice versa on the other billet. This is where they will make contact inside of the sleeve.
Now that the billets can be butted together, so that the center lines match, we can glue them together using a spacer of cardboard that is the same thickness as our saw blade. ( we will cut them apart later.)
More next time.
|
|
|
|
Post by archeryman57 on Jan 24, 2010 2:05:58 GMT -4
You might need 1/4" plywood for your saw Rob. Or is it 7/32"?
|
|
|
|
Post by ARROW SLINGER on Jan 24, 2010 23:44:59 GMT -4
That saws for when I really bugger it!  Where does that little plate with the 2 holes fit in? |
|
|
|
Post by huntwisely on Jan 25, 2010 7:08:14 GMT -4
If I remember correctly, Clair's take downs usually have a rubber (or leather, I can't remember) bushung on the bitt end of the male section of the takedown. The metal plate goes on there. Metal plate on top of rubber, glued and screwed to the butt end of the male section. He tapers the butt section some, too.
|
|
|
|
Post by archeryman57 on Jan 25, 2010 12:30:00 GMT -4
John has it right Rob. The plate is to hold the rubber in place. This is for the ends that are cut at 90'. This has been a good working idea, but if you like the look of the ends being cut on an angle then it will work also. The main thing is to fit the butts to the sleeve so that the limbs line up when they are together. I taper the male end so that it fits easily in the sleeve and use the rubber and plate to take up the slack. The clearance is to allow for the swelling of the wood as the moisture level changes.
|
|
|
|
Post by ARROW SLINGER on Feb 1, 2010 8:35:48 GMT -4
I have some scraping to do first to find one ring! hopefully I can use them without backing. Not to thick to start with, Will post the outcome soon!
|
|
noluck
Full Member
   Always learning something new
Posts: 206
|
Post by noluck on Jun 20, 2010 23:28:42 GMT -4
How is the build going? Any pics?
|
|